Encode Blu-ray movies playback on Mac Mini HTPC with PLEX


Summary: One common question always puzzle you that want to play Blu-ray films on Mac Mini HTPC with PLEX? Here is the answer.

Blu-ray must be a hurt for Mac mini owners, If you’re HD movie lover and wish to add Blu-ray movies to the newly built Mac HTPC, Pavtube BDMagic for Mac and PLEX are good combination. PavtubeBDMagic for Mac copies protected Blu-ray movie to your Mac HTPC and PLEX plays high-definition 1080p M2TS files from Blu-ray structure. In that way you can play Blu-ray movie on Mac Mini HTPC without quality loss. The following guide tells how to copy/rip Blu-ray movies to Mac Mini HTPC with Pavtube BDMagic for Mac.

Preparations:

1.Mac mini
2.external BD drive
3.source Blu-ray Discs.
4.Pavtube Mac mini Blu-ray Player (The software is able to back up Blu-ray movies and commercial DVDs for Mac HTPC Media Center without quality loss or compress the BD and DVD movies to MOV, MP4, MKV, M4V, etc. in perfect sync.) Review:Enrich your Mac Mini HTPC Media Library: rip DVD and Blu-ray movies to Mac Mini HTPC with XBMC

How easy it is to get Blu-ray movie playback working with the popular Mac Mini HTPC with XBMC?

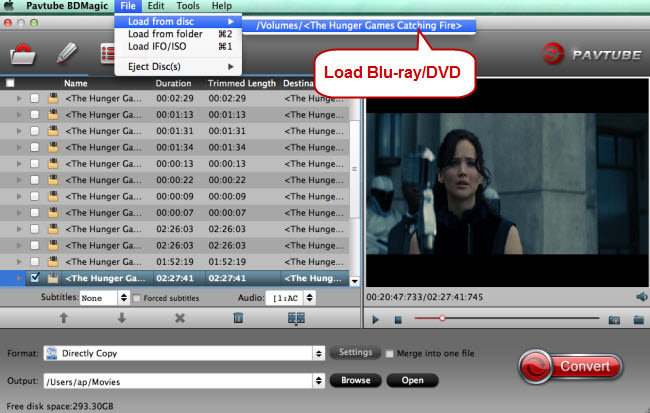
Step 1. Load Blu-ray movies.

Install and run the Pavtube BDMagic for Mac on your Mac. When the below interface pops up, click "Blu-ray disc" icon to import Blu-ray or DVD movie. If you already have a Blu-ray folder or ISO file on your HDD, you can either click "Blu-ray Folder" icon or "IFO/ISO" to load your source files.


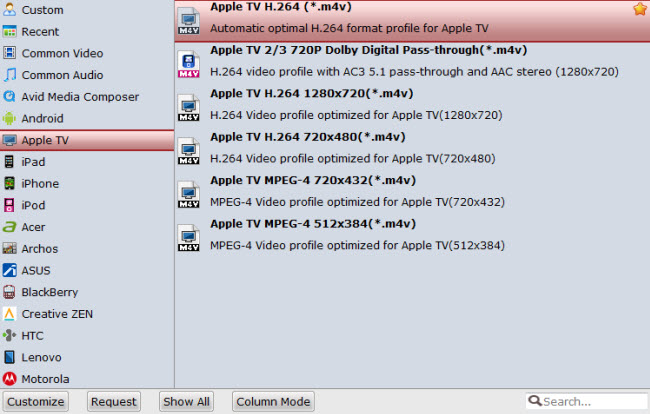
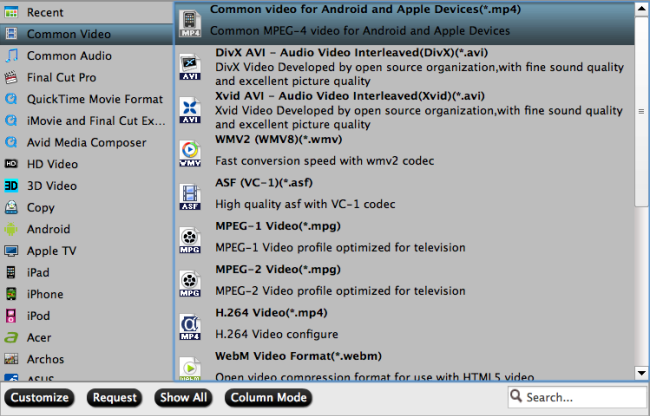
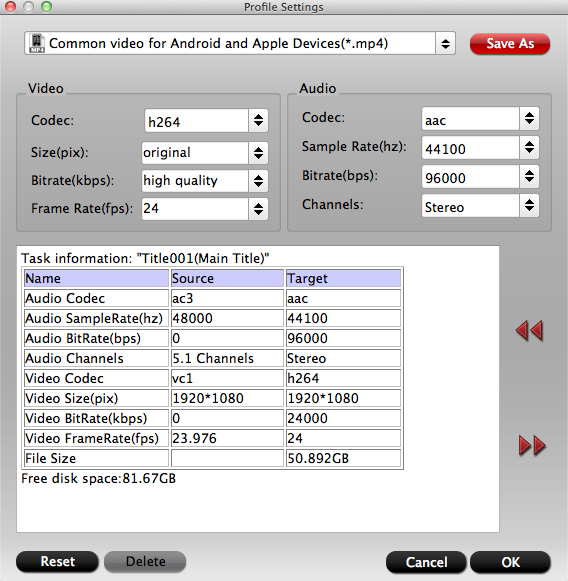
Step 2. Specify an output format.

Click “Browse” button and specify an output location. Make sure there is enough space for a whole BD movie (usually 25GB-50GB) when backing up Blu-ray disc to Mac HDD.

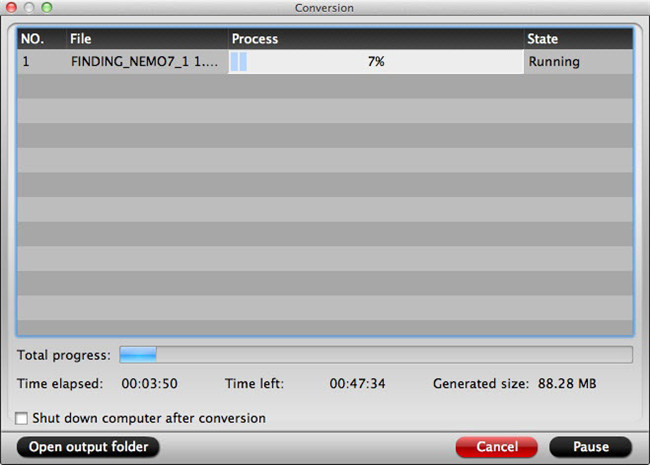
Step 3. Back up Blu-ray for PLEX playback on Mac Mini HTPC.

Click on “Copy the entire disc” button to back up Blu-ray/DVD movie to Mac. A 90 min. Blu-ray takes about 40 min to copy to Mac hard drive. After the copying process completes, you can get the final output files by clicking “Open” button with ease. The ripped Blu-ray directory contains two folders, “BDMV”and “CERTIFICATE”. The PLEX is able to play the M2TS files from Blu-ray directory.


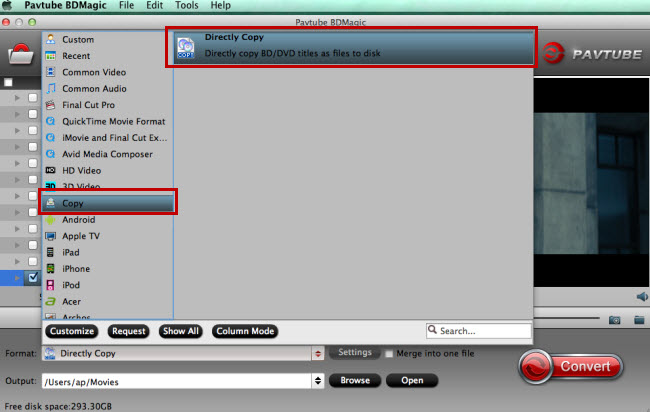
Tips: Wanna copy the M2TS/ VOB streams only without menus and ads? Make some changes in Step 3. Click on the “Format” bar and choose “Copy”>> “Directly Copy” mode, and then click “Convert” button to start conversion.

Now, you can enjoy the Blu-ray movies on Mac Mini HTPC with PLEX. And Blu-ray/DVD playback can also be realized on these multifunctional game consoles just like: WiiXbox 360 and so on.

Money Saving Boundles:

BDMagic($49) + Vidpie($29) = Only $49.9, Save $28.1
BDMagic($49) + DVD Creator($35) = Only $49.9, Save $28.1


More 

Trim Video And Upload to Facebook With the PS4 
Stream BR Disc movies for watching via local SAN Device 
Fix Handbrake Rip DVD VOB to MP4 Aspect Ratio Distorted issue 
Import DVD to Avid Media Composer on Mac 
Keep Watch iTunes movies via Apple TV 4 Forever 
Alternative to XMedia Recode for OS X El Capitan-Digitizing 
Convert Blu-ray audio to Samsung phones in an incredible easy way 
Enjoy 3D Blu-ray Movies on Wii U With Top Wii U 3D Blu-ray Ripper 


Src 

Encode Blu-ray movies playback on Mac Mini HTPC 

Pavtube 40% Off Spirit Halloween Coupons & Discount


Pavtube launched 40% OFF Halloween Promotion from October 21 to November 6, 2015 when users can get top Video/DVD/BD Converter for Win/Mac with the least money. 
pavtube halloween promotion,halloween special offer, halloween sale 2015 

Halloween is coming. To give you a better Halloween celebration, Pavtube holds 40% off Halloween promotion from October 21 to November 6, 2015. During the period, you can get the professional Blu-ray/DVD Ripper and Video Converter for Win/Mac with less money than any other campaign. 

During Halloween, many people will not just watch Halloween movies but make Halloween videos by themselves. No matter Halloween movies enjoyment or Halloween video production, you probably need a video converter. For example, when you want to play your Blu-ray/DVD Halloween disc on your iPad Pro, Surface Pro 3, you can rip the disc to the device supported format with Pavtube BDMagic or Pavtube DVAid. Another case, you record the Halloween party scene and you are about to upload the camcorder video to Facebook to show your cool dressup, you’d better choose to transcode the camera video to Facebook or Vimeo accepted video with Pavtube Video Converter Ultimate. No matter what situations about video editing and producing, you can find the software you want at Pavtube Studio

Pavtube product is closed-source, not like Handbrake. But it deserves to pay for its life-long technical support and update in time to compatible with any Win/Mac system upgrade. Catch this opportunity and enjoy the best video production experience with the least money. 

The price comparison of Pavtube featured products between Halloween price and original price is as below: 
  • Pavtube Video Converter Ultimate: Original price $65, Now $52 
  • Pavtube BDMagic: Original price $49, Now $34.3 
  • Pavtube DVDAid: Original price $35, Now $21 
  • Pavtube ByteCopy: Original price $42, Now $33.6


Note: This attractive price will only be get until November 6, 2015. Please bear in mind all software programs will go back to original prices once the Halloween special offer 2015 ends. 

Time-limited. What are you waiting for? Action now! 

Pavtube 2015 Halloween Special Offer - Up to 40% Discount


Summary: Pavtube Studio presents big surprice for Halloween celebration with up to 40% discount on Blu-ray & DVD softwares. 

Festivals are always the best opportunities to purchase the goods you were not willing to buy or had no ability to afford in the past days. 2015 Halloween is coming. Are you ready to open your wallet? To make your Halloween celebration even greater, Pavtube Studio has prepared a great Halloween Promotion – we are offering you a generous 40% Discount on our Blu-ray & DVD Softwares (Windows 10 and El Capitan supported). 


Since Pavtube Studio offers many kinds of Blu-ray/DVD/Video softwares that you possibly don't know which one to choose, I can make a brief introduction and a recommendation to you. 

Recommendation 1: If you often do video conversion process, you can take Pavtube Video Converter Ultimate and Pavtube iMedia Converter for Mac into consideration. It can accept any Halloween movie source, like Blu-ray/DVD disc and 4K/SD/HD online/local video in any format and transform them to nearly any popular video format you have ever seen. 


Recommendation 2: For those who have plenty of Blu-ray discs, Pavtube BDMagic and Pavtube BDMagic for Mac will be the best choice. They are cheaper than the recommendation one but supply the same effect on Blu-ray/DVD Halloween movies. 


Recommendation 3: DVD owners who just need to rip and backup DVD disc or copy DVD folder, DVD ISO/IFO can focus on Pavtube DVDAid and Pavtube DVDAid for Mac. It only can deal with DVD movies but it is the cheapest item. 


Recommendation 4: Pavtube ByteCopy and Pavtube ByteCopy for Mac are for situation that your Halloween Blu-ray/DVD movies have several subtitles and audio tracks and you want to keep all the tracks and chapter markers while ripping and copying the discs. What's more, it enables you to extract FLAC/WAV audio from Blu-ray audio disc and extract SRT subtitle from Blu-ray movies. 


Think about which one is the best choice for you so that you can solve your video conversion problem with the least money. Don't waste the money-saving chance on Halloween. Just do it!

Keep Watch iTunes movies via Apple TV 4 Forever


Among all the popular media streamers, Apple TV is the big winner by dominating the largest market. One of the most important reasons why people choose Apple TV to stream media content to TV is that they can easily access iTunes store, the biggest online media store in the world. If you are new to iTunes and Apple TV, the below guides will help you get iTunes movie purchases or rentals to watch on your Apple TV.

Now let's get started from purchasing and renting iTunes movies on Apple TV 4.

Step 1. Select movies from Apple TV. Firstly, log into the iTunes Store from the main Apple TV menu. Then select Movies > Top Movies, Genius, Genres and Search to find a movie you would like to purchase or rent.

Step 2. Buy or rent movies from Apple TV. When you've decided on a selection you want, choose Buy or Rent from the onscreen menu to purchase or rent the movie you selected.

Step 3. Confirm movie purchasing or renting. After clicking the Buy or Rent button, a confirmation message will appear. Click OK to continue. Then a prompt will tell you where you can find your purchased or rented movies. You can click OK to continue.

Unfortunately, Apple has not made playing of rented movies that easy. Of course, you can rent a movie directly from the iTunes Store on Apple TV. However, movies rented on your Apple TV are not transferable to any other device and can only be viewed on your Apple TV. And for iTunes rentals, it's also inconvenient due to rental expiration and viewing limits. And for iTunes rentals, it’s also inconvenient due to rental expiration and viewing limits. How to watch iTunes rentals on Apple TV? Is it possible to keep iTunes rentals forever?For you who don't like the time limit on iTunes movies you rented via Apple TV, we are providing you an ultimate solution to get rid of the 24-hour time lock on iTunes movie rentals for good. You can use the third-party iTunes DRM removal tool, like Pavtube ChewTune to get it done. Pavtube ChewTune is a smart and powerful iTunes DRM remover as well as M4V converter developed to remove DRM lock from iTunes movie rentals and purchases while converting the protected M4V videos to DRM-free MP4 with original quality preserved.


Keep Watch iTunes movies via Apple TV 4 Forever

Step 1. Load iTunes Rental Movie

Add video to this iTunes DRM remover and converter. Drag and drop your iTunes rentals to it directly, or you can click "File" to load videos as showed blow.


Step 2. Select Output FormatClick "Format" bar to choose an output format for Apple TV.


Step 3. Start Converting iTunes Rentals to Apple TV

Click the round icon "Convert" in the bottom right corner on the software's interface to start the conversion. And you can find the converted DRM-free iTunes video immediately by clicking "Open".

Step 4. Play iTunes Rentals in Apple TV

Launch iTunes on your PC to import the converted non-DRM files to iTunes library. Then click File > Home Sharing > Turn On Home Sharing. Enter the Apple ID and password for the iTunes Store and click Turn on Home Sharing.

After you turn on Home Sharing, Apple TV will automatically find iTunes libraries on your home network and are use the account name you entered. The shared libraries will appear in Computers on the main menu of Apple TV

More 
How to Donwsize 50GB Blu-ray to under 25GB video and burn with TOAST 
Alternative to XMedia Recode for OS X El Capitan 
Rip/Backup Blu-Ray To Laptop To Watch Without External Player 
The Hassle-Free Guide to Enable 2D/3D Blu-Ray and DVD Playback in XBMC 
Alternative to XMedia Recode for OS X El Capitan-Digitizing 
Top Blu-ray Ripper Reviews: MakeMKV vs ByteCopy vs DVDfab 
FLAC to iTunes – How to Import FLAC Audio to iTunes on Mac 
Convert Youtube videos to MP4/MOV/M4V for iPad/iPhone/iPod on Mac 

Src 
Keep iTunes Rentals Forever to Watch iTunes Movie 

Alternative to XMedia Recode for OS X El Capitan-Digitizing


XMedia Recode is a Freeware video and audio transcoding program for Microsoft Windows developed by Sebastian Dörfler. It can import and export many types of files such as WMV, MP4, MP3, 3GP, Matroska and more. XMedia Recode can convert unprotected DVDs or DVD files to any supported output file. XMedia Recode features a drag-and-drop style interface and uses job queuing and batch processing to automate the task of transcoding multiple files. 
If you just switched to Mac, you will find there is no Mac version of XMedia Recode. Being so used to XMedia Recode, how you can finish your task without it? Don’t worry, without XMedia Recode for Mac, you can use alternative to XMedia Recode for file conversion. This article introduces a smart free Pavtube iMedia Converter for Mac replacement and a professional XMedia Recode Mac alternative to manage file conversion for you. 


Other Download: 
- Pavtube old official address: http://www.pavtube.cn/imedia-converter-mac/ 
- Cnet Download: http://download.cnet.com/Pavtube-iMedia-Converter/3000-2194_4-76177788.html 


Alternative to XMedia Recode for OS X El Capitan 

Step 1: Add files. 

Click the "Load file(s)" or "Add video" button to import files 


Step 2. Set output format 

Clicking the Format bar, you can choose output format from the format list or customize which formats to be shown on the list. 


All formats here are set with optimized video/audio codecs, bitrates, frame rates, etc. But you can still specify as you like by clicking Settings button.Step 3. Edit Video. 

In the Profile Settings window, you can choose or specify exactly the parameters you like. And in the Task information section, you can compare the detailed information of the source video and the target video. 


In “Video Editor” there are seven edit tabs: Trim, Crop, Text Watermark, Image/Video Watermark, Effect, Audio Editor and Subtitle. 

Play/Pause: Click to start playing the current video or pause the playing. 
Stop: Click to quit playback. 
Previous Frame: Click and go back to the previous frame. 
Next Frame: Click and go to the next frame. 
Left square bracket: Click to set the start time for trimming. 
Right square bracket: Click to set the end time for trimming. 
Flip Horizontal: Click to flip the image horizontally. 
Flip Vertical: Click to flip the image vertically. 
Flip 90°towards left: Click to flip the image 90°towards left. 
Flip 90°towards right: Click to flip the image 90°towards right. 
Rotate counter-clockwise: Click to flip the image 90°towards left. 
Rotate clockwise: Click to flip the image 90°towards right. 
Reset: Click to restore default value. 

Step 4. Start Conversion 

Clicking the Convert button on main interface, you can go to Conversion window to start conversion. 


You can find conversion information on the window, such as Time elapsed, Time left, Generated size, and Estimated size. 

Ticking off Shut down computer after conversion option, you can leave the program running and do other things instead of waiting around for the conversion. 

After the conversion, you can click Open output folder to popup output directory with the converted files. 

Pavtube Mac Products Upgrade Support for Mac OS X El Capitan


With the release of OS X 10.11, we've received some reports of Pavtube Mac products crashed on El Capitan. After working on this urgently, Pavtube Sutio has recently updated all its Mac Blu-ray/DVD/Video products with perfect support for Mac's new operating system - Mac OS X El Capitan. Products that works compatible well with El Capitan including: Pavtube Video Converter for MacPavtube HD Video Converter for MacPavtube MTS/M2TS Converter for MacPavtube MXF Converter for MacPavtube iMixMXFPavtube BDMagic for MacPavtube ByteCopy for MacPavtube DVDAid for Mac,Pavtube iMedia Converter for Mac


Copy/Backup Blu-ray/DVD on El Capitan 

Have problem to copy/backup Blu-ray/DVD disc on Mac OS X El Capitan, never mind, with Pavtube newly upgraded Blu-ray/DVD products, you will get no difficulty to make a full disc copy or the main movie copy of the original 2D/3D Blu-ray/DVD disc on Mac OS X El Capitan. Besides that, the program also enables you to rip/convert Blu-ray/DVD disc to various different file formats on El Capitan platform for playing on iPhone/iPad/iPod, Android phone and tablets, Windows phones or tablets, game consoles, HD media players, streaming to Apple TV/Amazon Fire TV/Roku, etc. 

Play and edit videos on El Capitan 

Play and edit any video files on Mac OS X El Capitan can also be easily achieved with Pavtube upgraded Mac Video Converter applications. You can effectively convert virtually any file formats including AVI, WMV, MP4, MOV, FLV, VOB, MKV, MKV, MTS, M2TS, Tivo, H.265 in SD, HD, 2K, 4K videos to your desired file formats or devices and programs optimized file formats for better viewing. For camera and camcorder users, you will have a fast and fluid workflow on Mac OS X El Capitan with our program by exporting professional video editing codec such as Apple Prores Codec for Final Cut Pro 6/7/x, Apple Intermediate Codec(AIC) for iMovie/Final Cut Express, DNxHD MOV for Avid Media Composer, After Effects CC/Adobe Premiere Pro/Adobe Premiere Elements/Sony Vegas specially optimized file formats, etc. 

Related articles: 

Mac OS X El Capitan Required System Requirements and Supported Mac Models 

How to Backup and Copy 2D/3D Blu-ray on Mac OS X 10.11 El Capitan? 

How to Make a Copy/Backup of DVD movies to Mac OS X 10.11 El Capitan? 

How to Convert and Play 2K/4K/HD Video on Mac OS X 10.11 El Capitan? 

Import and Edit Sony PXW-F7S 4K XAVC-L to FCP X on Mac OS X El Capitan 

Play and Edit BDMV Files with QuickTime, iMovie, FCP on Mac OS X El Capitan 

How to Upload Sony XDCAM to YouTube, Vimeo, Facebook Mac OS X El Capitan? 

Best 5 MTS/M2TS Converter for Mac 

2014 Top 5 Best HD Video Converter for Mac Review 

Src 

Pavtube Mac Upgrade for El Capitan Support 

7 Ways To Watch 4K Video In Your Home & How To Play 4K


Depending on your age, you may recall the first person on your block to get a VCR, the first to connect to the Internet, or the first person to take a “selfie” with a smartphone. Now you can be the first person with a 4K TV—however, content still remains on the scarce side, but there is a handful of ways to get 4K into your home. 


In order to do this, you’ll need a 4K monitor, TV or projector, and possibly a special media device or a 4K-capable video camera. Why bother? 4K Ultra HD has essentially four times the pixel density of 1080p. It’s 2160p, or 3840 x 2160. Given the leap in quality from standard definition to 1080p, just imagine the crisp visuals of native 4K content on a 4K display. That being said, the main hurdles are price and availability of content. Here are your current options: 

You can watch Ghostbusters (and 70 other films) 
This requires a Sony 4K UHD TV and a Sony 4K Ultra HD Media Player. The player comes with 10 feature films in 4K, and Sony’s Video Unlimited 4K service offers more than 70 full-length 4K films and TV shows, with selections like Breaking Bad, Taxi Driver, and others. More than 100 titles are expected to be available by the end of this year. 

Save a buck and just watch the free Sony videos 
You can check out the free 4K demo videos at Sony Video Unlimited, as well as more than 50 indie films, sports clips, and live music programs. However, this also requires a Sony 4K UHD TV and the Ultra HD Media Player. 

Watch an 8-minute video about Mexico on Netflix 
Netflix is currently testing a 4K clip titled “El Fuente.” The short video is available through their instant streaming library at several different frame-per-second (fps) rates. The company has said they hope to roll out a lot more 4K content for streaming within the next year. 

Shoot it yourself 
One way to go 4K is to watch footage shot with a Blackmagic Production Camera 4K or a GoPro HERO3+ Black Edition. 

Get a REDRay 
You can use a REDRay media player to send a native 4K or up-converted HDTV signal to a UHD TV. The player is also compatible with 3D media, and RED offers online content distribution through their Odemax.com network. 

There’s an app for that 
You can watch footage shot with an Acer Liquid S2 or Samsung Galaxy Note 3 smartphone. The Note features a 13-megapixel rear-facing camera capable of filming video in 4K at 30 fps. 

Go Euro 
If you’re in Europe, you can check out the Eutestat 10A, the first dedicated 4K UHD channel. 

These are some of the ways you can get 4K video into your home now, but the future of the format is highly speculative. However, with the development of High Efficiency Video Coding (HEVC), watching large 4K files over the Internet should become a reality, since it requires half the bit rate compared to older coding formats. This means there’s even greater promise for 4K in your home. In the future, content will most likely come from digital distribution, disc-based physical formats and broadcast TV. So once you’ve got your 4K TV and more movies and shows become available, you’ll be all set. And your friends will remember you as the first on your block to have 4K. 

Hot Search: 4K Movie on Windows 10 | 4k Blu-ray Discs on 2015 | 4K Ultra HD videos to Android | Best H.265 Video Converter for iOS devices | 

Top 4K Video Converter For 4K Lovers – Pavtube Video Converter Ultimate 

In Fact, users can convert 4K video to common used video formats with a 4K video converter. Based on the feedbacks on the forum, a professional 4k video converter named Pavtube Video Converter Ultimate is highly recommended. This all-in-one converting tool is surely in the support of converting 4K UHD videos in any formats faultlessly. As the aspects of this 4K video converter you guys highlight are: ease of use, fast speed to the utmost, 100% clean and multifunction. Here is review

Now follow the guide below to learn how to convert 4K Video to MP4 for watching on Any device. 

Free Download this top 4K UHD Video Converter/Compressor/Player: 


Other Download: 

– Pavtube old official address:http://www.pavtube.cn/blu-ray-video-converter-ultimate/ 
– Cnet Download: http://download.cnet.com/Pavtube-Video-Converter-Ultimate/3000-2194_4-75938564.html 

More 


Solve Can't Play MP4 on PS4 After Convert MP4 to PS4 Supported Format 
DVD chapter markers when copying onto QNAP TS-469L NAS 
Backup Blu-Ray Movies From Disc To Disc As A Replica 
Import Blu-ray into Windows Movie Maker for Editing 
Enjoy Music DVDs on iPad Mini 4 for your Entertainment 
Top 5 Video Tools for Playing Video/Movie on Android Tablet/Phone 
Convert MKV movies to 720p MP4 for Android Phones and Tablets on PC/Mac 
Upload Blu-ray to Dropbox for Sharing 


Src 
7 Ways to Watch 4K Video in Your Home & How to Play 4K