Apple introduced its new flagship 12.9-inch iPad Pro at its fall media event on September 9. As Apple’s largest mobile device, the iPad Pro offers 78 percent more screen real estate than the 9.7-inch iPad Air 2, Apple’s previous flagship tablet, which it also takes design cues from. The iPad Pro’s display has a resolution of 2732 x 2048 at 226 pixels per inch, for a total of 5.6 million pixels, more than any other iOS device. The big screen is perfect for those who wanna enjoy watching MOV movies on a portable device.
Do you have MOV movies that you would like to play on an iPad Pro but surprised to find that iPad doesn’t accept your MOV videos? If you having no idea on this, trying to read this article, you will get the top solution for backuping Any MOV movie files to iPad Pro.

Well, according to the information on Apple’s official site, the iPad supports MPEG-4 and H.264 videos in .mov, .m4v and .mp4 file formats. iPad cannot play the MOV videos if they are encoded with some other codecs. If your MOV files are incompatible with iPad Pro, that’s probably because of the video codes issue and you will need to convert MOV to iPad media formats first.
In actually, with an appropriate MOV to iPad Pro converter in hand, the video format incompatibility MOV files issue with the new iPad Pro will be solved. Here, Pavtube iMedia Converter for Mac is all that you need. Here is the review.
The Mac video converter keeps pace with the times and supports all the existed iPad models including iPad Air 2, iPad Mini 3, iPhone 6s/6s Plus, etc, as well as other mainstream Apple, Android, Windows and Microsoft devices. Built-in 200+ video and audio codecs, this award-winning iPad Pro video converter is able to change various movies including MOV, H.265, MTS, MXF, Tivo, MKV, WMV, AVI, VOB, etc and Blu-ray/DVDdiscs. With 2K/4K/HD resolution to iPad Pro playable ones like MP4, MOV, M4V, etc within a short time.


Other Download:
- Pavtube old official address: http://www.pavtube.cn/imedia-converter-mac/
- Cnet Download: http://download.cnet.com/Pavtube-iMedia-Converter/3000-2194_4-76177788.html
Convert MOV to iPad Pro with Suitable Video formats at Ease
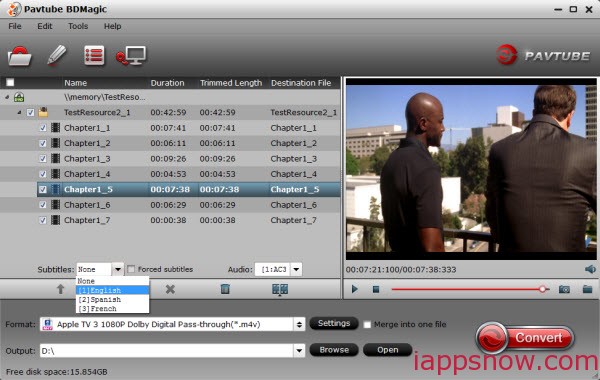
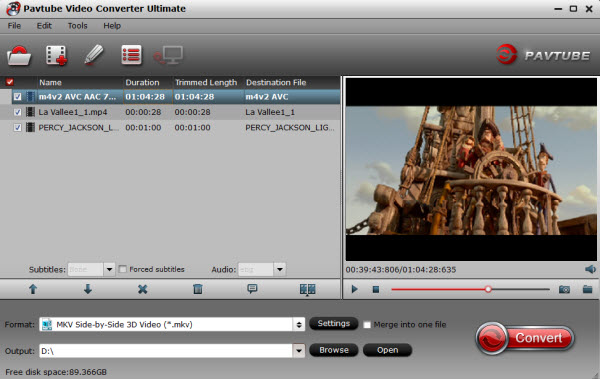
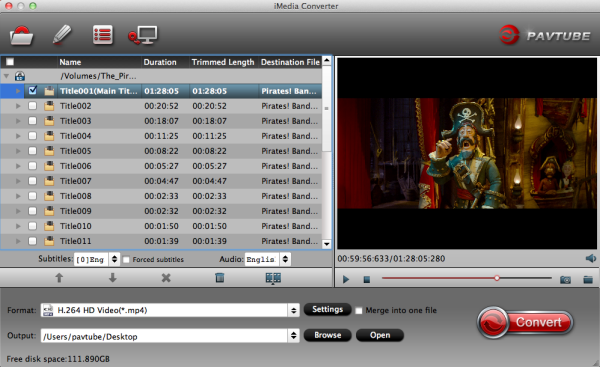
Step 1. Import MOV media files
Click the top left icon to import Blu-ray/DVD disc, folder, IFO or ISO files; click the second icon to add MOV video files. Or you can drag and drop videos to it directly.
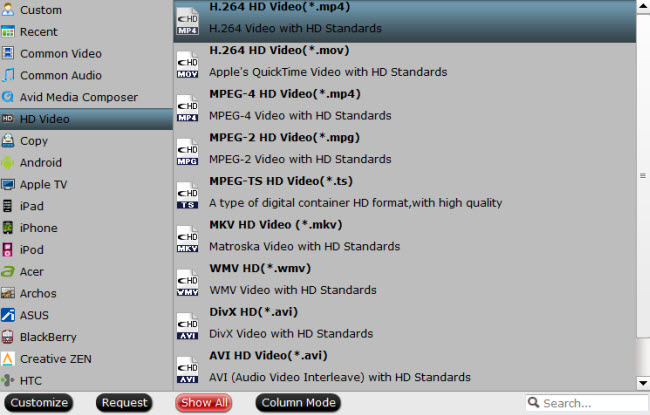
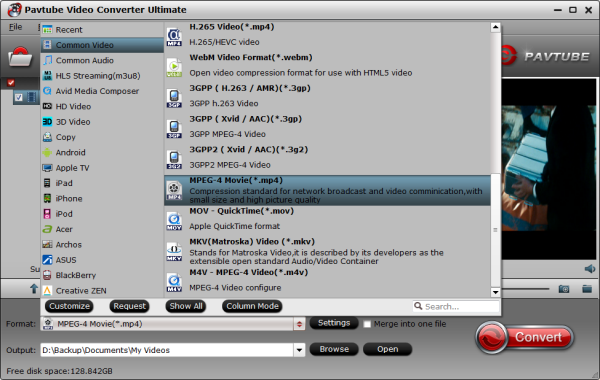
Step 2: Choose MP4 format as output format.
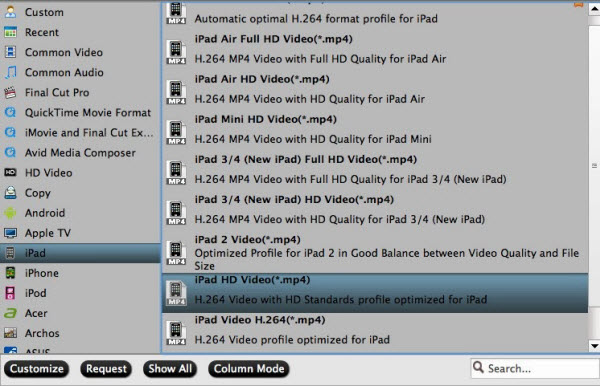
Hit the menu bar of “Format”, choose “iPad” category and find the optimal video format for iPad Pro.“iPad HD Video(*.mp4)” is recommended here. You can also choose MP4, M4V format from Common Video.
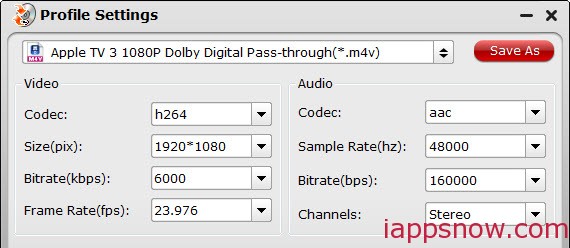
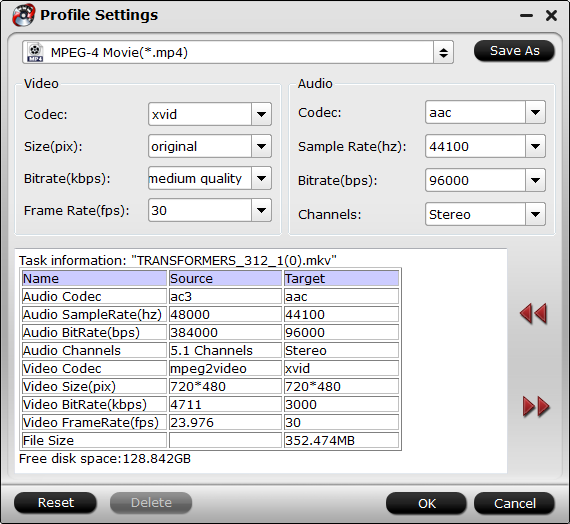
Tip: If the default settings do not fit your requirement, you can click “Settings” icon to enter “Profile Settings” panel to adjust video size, bitrate, frame rate and audio channels.
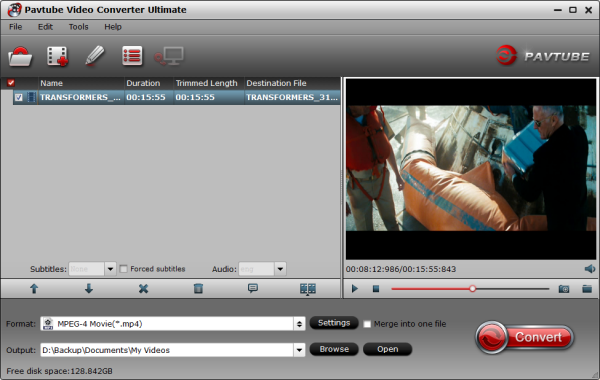
Step 3: Start the MOV to iPad Pro conversion.
Hit the big Convert bar, The conversion time mainly depends on your source video file size. After getting the converted movies files, you can transfer the converted MOV files to iPad Pro via iTunes.
If you don’t know how to put and play video on iPad Pro, just follow the steps to realize it:
Step 1: Connect your iPad Pro to your PC or Mac
Step 2: Open iTunes if it doesn’t fire up automatically
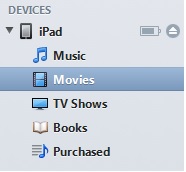
Step 3: Select your connected iPad from the list of devices. (You’ll find this on top-right or on the sidebar if it’s enabled. You can enable the sidebar from the View menu option.
Step 4: Under the device, you have an option called Movies. Select this. (If you’ve got videos on the iPad already, they’ll be shown as a list)
Step 5: Now all you have to do is drag and drop the video files that you want to copy. To make this easy, have the folder containing the video file ready, have iTunes open in the background and just drag-and-drop the file from the folder into the iTunes window.
Step 6: You should now see a progress bar that will indicate how long it will take to copy the file. Got short videos? Fast. Full-length movies? That’ll take a little time.
Note: Apple iTunes 12 is different than what most users are used to. Here’s how it’s done.
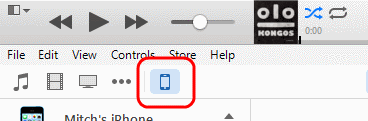
Step 1: Connect the device to your computer using a USB cable. A button will appear toward the upper-left part of the screen. Select it to access the settings on the device.
Step 2: Select the “Photos” option on the left sidebar.
Check the “Sync Photos from” option, then choose to sync “All folders” or “Selected folders”. You can also select the “Include videos” check box to sync your personal videos. If you choose the “Selected folders” option, you will be give the option to check the folders you want to sync to the device.
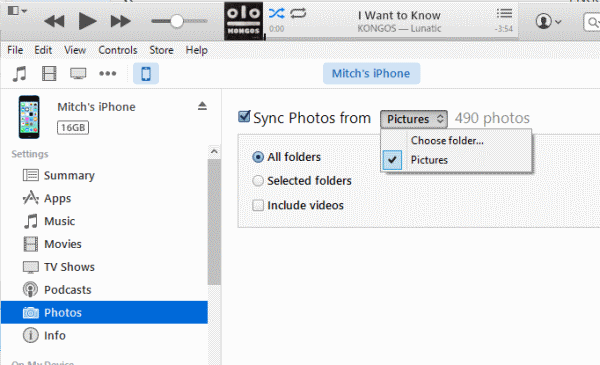
Step 3: Click the “Done” button, then click “Apply”. iTunes will then transfer your photos over to your Apple device.
Now I believe that you can get excellent movie viewing experience on iPad Pro.
So there you have it. Pretty simple. Now you can start playing HD Videos movies on iPad Pro anywhere you want them.
More
Install Connect Your Galaxy Tab To A Mac Computer Using Mac Kies
Rip 3D Blu-rays to Plex Server for playback with 5.1 channel on TV via Raspberry Pi
Blu-ray to Galaxy - Rip Blu-ray to Play on Samsung Galaxy A8 for Freely
M2TS to PS4 - Convert Blu-ray M2TS to PlayStation4
ATV 3 MKV best approach-Get MKV videos to play on Apple TV 3 without problems on Mac
Digitize your Blu-ray/DVD movies for playing on Amazon Fire TV
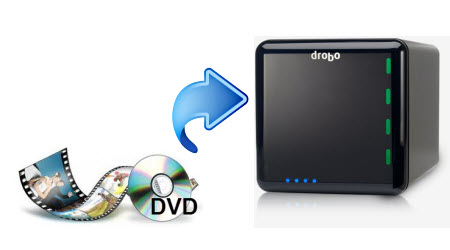
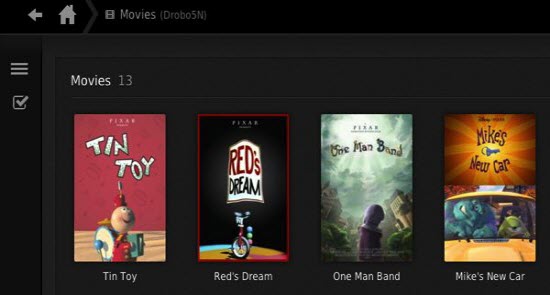
Copy Movie DVDs to 25 terabyte Drobo DAS Device for backup
Src
MOV to iPad
Do you have MOV movies that you would like to play on an iPad Pro but surprised to find that iPad doesn’t accept your MOV videos? If you having no idea on this, trying to read this article, you will get the top solution for backuping Any MOV movie files to iPad Pro.

Well, according to the information on Apple’s official site, the iPad supports MPEG-4 and H.264 videos in .mov, .m4v and .mp4 file formats. iPad cannot play the MOV videos if they are encoded with some other codecs. If your MOV files are incompatible with iPad Pro, that’s probably because of the video codes issue and you will need to convert MOV to iPad media formats first.
In actually, with an appropriate MOV to iPad Pro converter in hand, the video format incompatibility MOV files issue with the new iPad Pro will be solved. Here, Pavtube iMedia Converter for Mac is all that you need. Here is the review.
The Mac video converter keeps pace with the times and supports all the existed iPad models including iPad Air 2, iPad Mini 3, iPhone 6s/6s Plus, etc, as well as other mainstream Apple, Android, Windows and Microsoft devices. Built-in 200+ video and audio codecs, this award-winning iPad Pro video converter is able to change various movies including MOV, H.265, MTS, MXF, Tivo, MKV, WMV, AVI, VOB, etc and Blu-ray/DVDdiscs. With 2K/4K/HD resolution to iPad Pro playable ones like MP4, MOV, M4V, etc within a short time.
Other Download:
- Pavtube old official address: http://www.pavtube.cn/imedia-converter-mac/
- Cnet Download: http://download.cnet.com/Pavtube-iMedia-Converter/3000-2194_4-76177788.html
Convert MOV to iPad Pro with Suitable Video formats at Ease
Step 1. Import MOV media files
Click the top left icon to import Blu-ray/DVD disc, folder, IFO or ISO files; click the second icon to add MOV video files. Or you can drag and drop videos to it directly.
Step 2: Choose MP4 format as output format.
Hit the menu bar of “Format”, choose “iPad” category and find the optimal video format for iPad Pro.“iPad HD Video(*.mp4)” is recommended here. You can also choose MP4, M4V format from Common Video.
Tip: If the default settings do not fit your requirement, you can click “Settings” icon to enter “Profile Settings” panel to adjust video size, bitrate, frame rate and audio channels.
Step 3: Start the MOV to iPad Pro conversion.
Hit the big Convert bar, The conversion time mainly depends on your source video file size. After getting the converted movies files, you can transfer the converted MOV files to iPad Pro via iTunes.
If you don’t know how to put and play video on iPad Pro, just follow the steps to realize it:
Step 1: Connect your iPad Pro to your PC or Mac
Step 2: Open iTunes if it doesn’t fire up automatically
Step 3: Select your connected iPad from the list of devices. (You’ll find this on top-right or on the sidebar if it’s enabled. You can enable the sidebar from the View menu option.
Step 4: Under the device, you have an option called Movies. Select this. (If you’ve got videos on the iPad already, they’ll be shown as a list)
Step 5: Now all you have to do is drag and drop the video files that you want to copy. To make this easy, have the folder containing the video file ready, have iTunes open in the background and just drag-and-drop the file from the folder into the iTunes window.
Step 6: You should now see a progress bar that will indicate how long it will take to copy the file. Got short videos? Fast. Full-length movies? That’ll take a little time.
Note: Apple iTunes 12 is different than what most users are used to. Here’s how it’s done.
Step 1: Connect the device to your computer using a USB cable. A button will appear toward the upper-left part of the screen. Select it to access the settings on the device.
Step 2: Select the “Photos” option on the left sidebar.
Check the “Sync Photos from” option, then choose to sync “All folders” or “Selected folders”. You can also select the “Include videos” check box to sync your personal videos. If you choose the “Selected folders” option, you will be give the option to check the folders you want to sync to the device.
Step 3: Click the “Done” button, then click “Apply”. iTunes will then transfer your photos over to your Apple device.
Now I believe that you can get excellent movie viewing experience on iPad Pro.
So there you have it. Pretty simple. Now you can start playing HD Videos movies on iPad Pro anywhere you want them.
More
Install Connect Your Galaxy Tab To A Mac Computer Using Mac Kies
Rip 3D Blu-rays to Plex Server for playback with 5.1 channel on TV via Raspberry Pi
Blu-ray to Galaxy - Rip Blu-ray to Play on Samsung Galaxy A8 for Freely
M2TS to PS4 - Convert Blu-ray M2TS to PlayStation4
ATV 3 MKV best approach-Get MKV videos to play on Apple TV 3 without problems on Mac
Digitize your Blu-ray/DVD movies for playing on Amazon Fire TV
Copy Movie DVDs to 25 terabyte Drobo DAS Device for backup
Src
MOV to iPad